

How To Repair Belectric Bicycle Controler
Introduction
What to audit and do when looking to resolve an electrical trouble or accept autonomously a controller to audit and enhance information technology likewise as fix other minor issues if they exist- what to wait for!
I bought this bike for $80 Canadian and have to figure out issues which I believe I did quickly and now I am reassembling the bicycle (bought information technology with plastics taken off and controller removed only the person was wrong to consider replacing his good controller when information technology was merely a wire shorting out even though everything looks new i found the shorted wire within 10 mins. These pics are not in sequence and are only a guide to things I do and why.
This will help y'all fix your bike and keep you going for years without spending a dime sometimes.
I am also posting these pics on the Countless Sphere website and promise to brand YouTube videos soon.
You volition need simple tools and very little know-how. You'll just demand a bit of patience, and take your time doing enquiry.
This is an ongoing mission, so check dorsum for updates.
I'one thousand just just showtime the project. These pics are from the last few hours.
-
-
Annotation that you should not be moisture or barefeet when handling batteries and powered stuff. Do Discover Swelling & cracks in lead acid batteries these are rock dead and are non revivable every bit they have 0 volts. Maybe the Epsom Salts pull a fast one on every bit noted on many YouTube videos volition get some life from these but are junk to me.
-
Look for corroded and loose connections - Annotation the wiring diagram of how these four batteries are wired to make 48 volts. For 36 volts simply remove a battery from the connection.
-
-
-
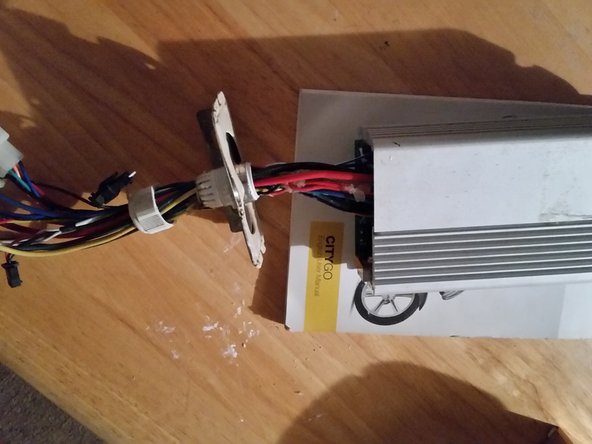
Remove screws, loosen white plastic screw, slide casing finish over wires to betrayal & remove controller. Look for any signs of water or overheat damages. In moving-picture show 3 notice the scarlet wire and on the board adjacent to it are two pieces what appears to exist bare wires. They are shunts & tin be soldered a bit on ends to add output power. DON'T solder all the manner!!
-
-
-
Observe the thick lines of solder on the board especially - this helps the ability flow without burning out thin lines- this is an impressive controller on a cheap wheel so far!
-
-
-
Inspect connectors for melting corrosion & bad or cleaved wires or connectors- they should expect clean like this one, absolutely No problems so far! This estimator isn't burnt like the seller suggests and $100. office from manufactory- No! Cheap ones available!!
-
-
-
Inspect controller insides for cleaved wires and swelled capacitors and frayed wires loose solder points on the board. 2nd moving-picture show looks like the board is wet- normally a bad matter I have a new spray that protects information technology. Go to that later. I tin can smell burnt parts at times. Sniff around for the stinky electronic smell for clues and dark-brown/black Hot spots!
-
-
-
Inspect, lube, or replace bearings in eye of wheels existence careful non to damage wheel when removing or replacing. There may be a bearing place by you lot and begetting can be three to v.00 You accept to remove bearing and then it can be measured.. some bearings can be taken apart and greased but not adept unless in adept shape prior.
-


Conclusion
To ready electric result await at pics and see how things come apart and what to look for.and simple fixes.
Embed this guide
Cull a size and copy the code beneath to embed this guide equally a pocket-size widget on your site / forum.
Preview

How To Repair Belectric Bicycle Controler,
Source: https://www.ifixit.com/Guide/How+to+Repair+Electric+Bikes/75971
Posted by: freemanoluter.blogspot.com
0 Response to "How To Repair Belectric Bicycle Controler"
Post a Comment